In this blog we will see How to Enable or Disable Active Sync in Office 365 for user account.
We can choose to enable or disable Active sync on user mailboxes level, using the Exchange admin center, Microsoft 365 admin center or by using the Windows PowerShell.
We will talk about each in the below sections.
Steps for How to Enable or Disable Active sync in Office 365:
Earlier, you can only change the Active sync settings form the exchange admin center, now you can do it from the Microsoft 365 Admin center as well.
Steps to Enable or Disable Active sync from Microsoft 365 Admin center:
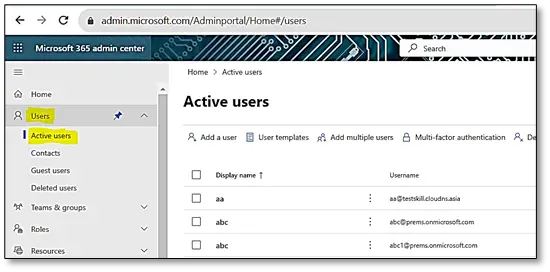
Go to https://admin.microsoft.com/, sign in with the global admin or exchange admin account, once signed in, click on the Users Tab on the left > Then click on the Active users Tab:
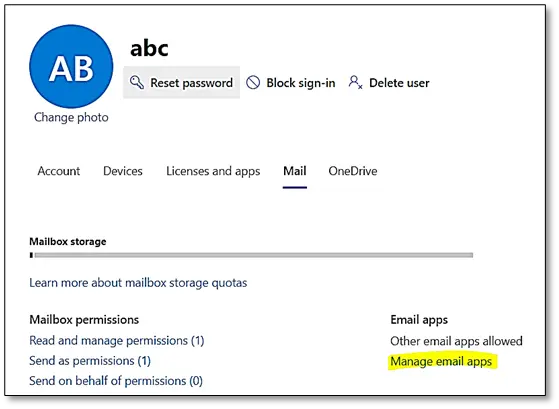
Search and click on the Display name of the User for which you want to change Active sync settings > Then click on the Mail tab, and then under Email apps, click on Manage email apps:
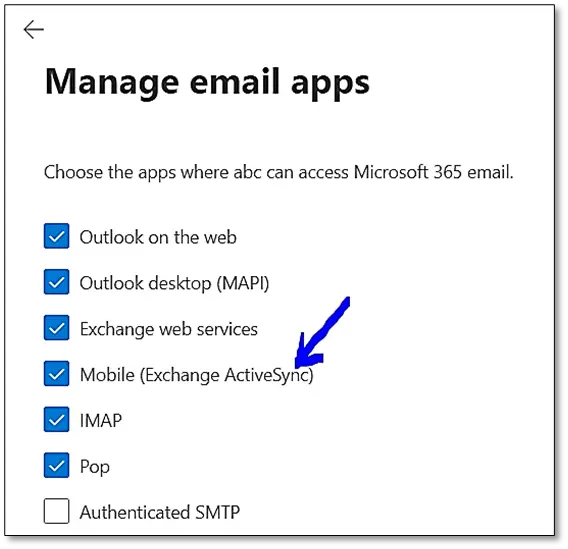
If you have check mark for the option “Mobile (Exchange ActiveSync)“, it mean that the Active sync is ON for the account:
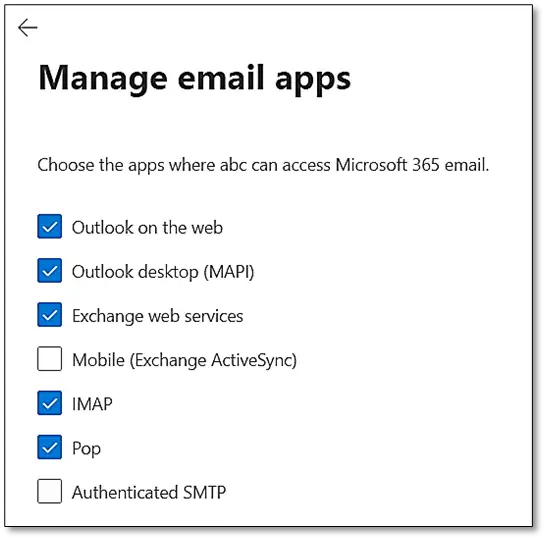
If you want to Disable Active Sync for the account then Uncheck the “Mobile (Exchange ActiveSync)” option, and then click on Save changes button:
Steps to Enable or Disable Active sync from Exchange Admin center:
Go to the Exchange admin center, mailbox page using the direct link: https://admin.exchange.microsoft.com/#/mailboxes
Sign in with you Exchange Admin account or Global admin account. Once signed in you should see the page:
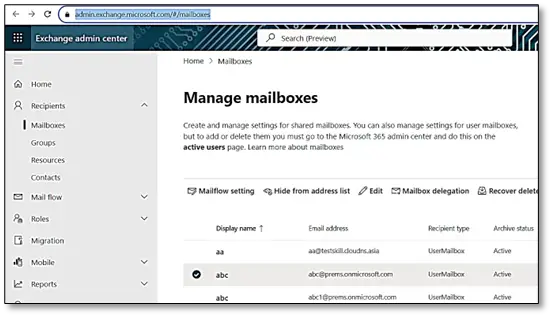
In Mailboxes tab, search and click on the user’s Display name, for which you want to change this settings, a page will open:
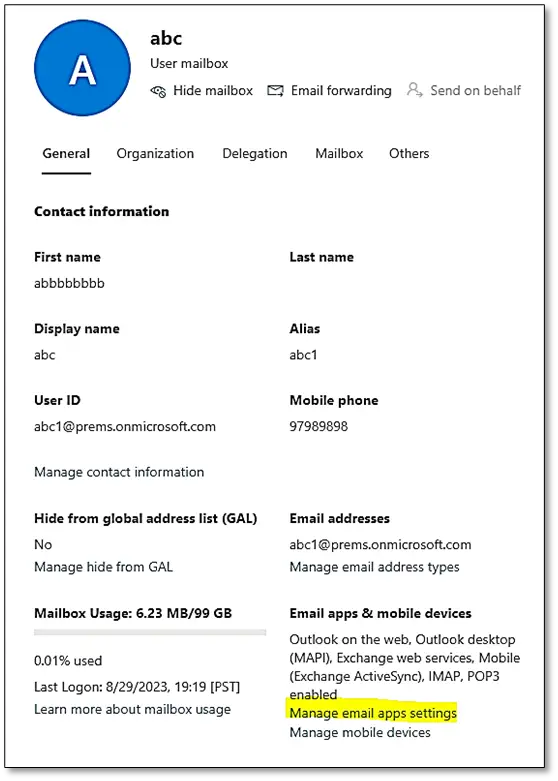
On this page, click on Manage email apps settings under Email apps & mobile devices option, a page will open:
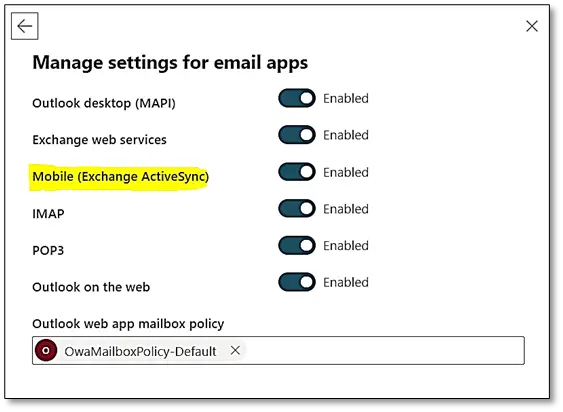
On this page, you can toggle the switch to Enable or Disable Mobile (Exchange ActiveSync), if you make any changes to this, please click on Save button to save the changes.
Steps to Enable or Disable Active sync using Windows PowerShell:
First we will have to connect the PowerShell to the exchange admin center, for that refer: How to connect to exchange online using PowerShell.
Once connected, you will have to run the following command to Disable active sync for an account:
Set-CASMailbox -Identity abc@prems.onmicrosoft.com -ActiveSyncEnabled $False
To Enable active sync for an account, run the following command:
Set-CASMailbox -Identity abc@prems.onmicrosoft.com -ActiveSyncEnabled $True
abc@prems.onmicrosoft.com in the above commands, is the email address of the account on which we want to change the respective setting.
To check the current setting of the Active sync, run the following command:
Get-CASMailbox -Identity abc@prems.onmicrosoft.com | Select ActiveSyncEnabled
If ActiveSyncEnabled is True, it means it is enabled, If ActiveSyncEnabled is False, it means it is Disabled for the respective account.
In this way, we can enable or disable active sync for an account in office 365, do let me know if this helped, if you have any query or suggestion, please mention the same in the comment box below.
Date: 29/08/2023