In this blog we will get to know How to Migrate your Domain Service to Microsoft 365.
In office 365 we can migrate custom domain and create email addresses with it as well, There are 2 action which we can perform with a domain, we can verify it or we can verify and then migrate the domain services to Microsoft.
Migrating the domain to Microsoft basically means that all your email communication will be in Office 365 once the domain is migrated, you will receive all your new emails on Office 365 mailboxes respectively going forward.
Verifying the domain allows us to be able to use the domain in Office 365 but migrating the domain services helps us with sending and receiving emails from and to the Microsoft 365 server.
Any domain can be verified in Office 365, the only condition is that it should not be already added into an existing Office 365 tenant.
Migrating the domain to Microsoft for email services should be done after confirming that no Migration of emails, etc. are needed. If you have existing data, please migrate them first and then Migrate the domain services to Microsoft 365.
We will talk about how to Verify and Migrate your Domain Service to Microsoft 365:
Go to https://Office.com. Sign in with the Global Admin account as only a global admin can perform these steps.
Click the Admin Tile:

Click Settings and then click on Domain:

Then Click on +Add a domain:

In setup Wizard, Enter the domain name which you want to verify in Office 365 and then click the button, Use this domain:

Now Select “Add a TXT record to the domain’s DNS records” For how do you want to verify your domain Option and click Continue:

The next step is, copy the unique TXT value, TXT name and TTL provided here and create a TXT Record at the Domain DNS manager(where the domain’s Name servers are pointing):

Once the Txt Record is created in domain DNS click on Verify option to confirm the Record is added correctly.
It takes minimum 10 minutes for it to propagate the txt records and for Microsoft to detect it.
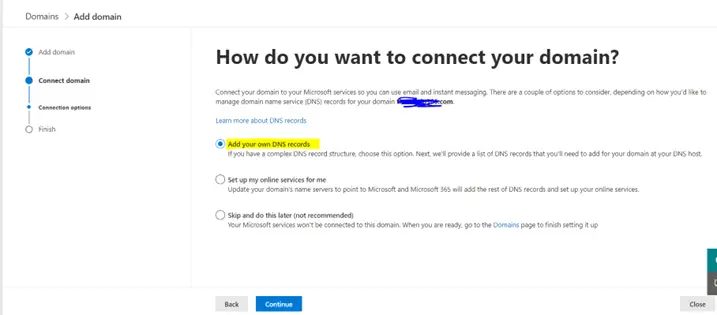
Only After the domain is verified we can migrate the domain services to start the email services with Office 365, Select Add your own DNS records Option:
To start routing email through Microsoft 365, select Exchange and Exchange Online Protection. Next, sign in to your domain DNS and add new DNS records that match the records shown here:
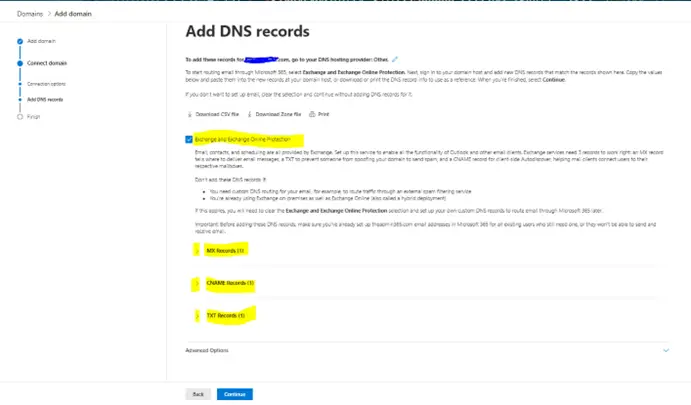
Expand each Records and use the value (Host Name, Points to address or value, Priority & TTL) to create the MX, TXT and CNAME records:
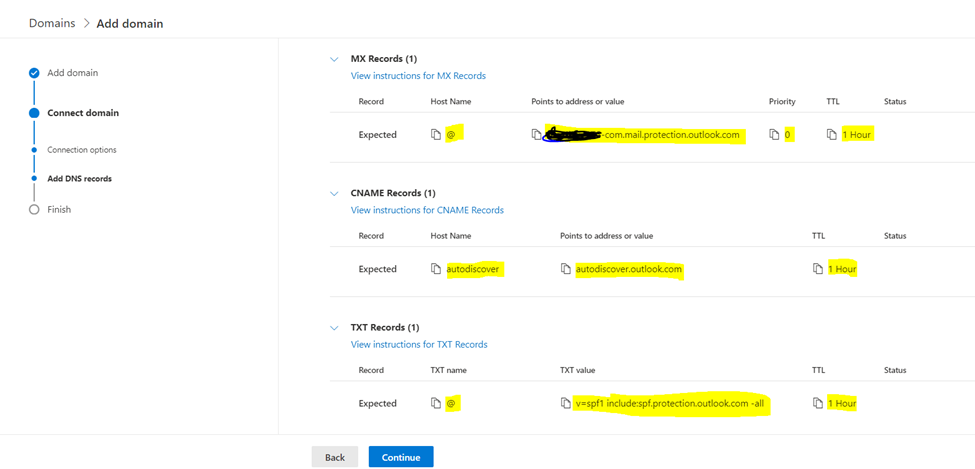
Once the 3 Records are Added, Click on Continue, it will check if the records are added and if they are added correctly it will complete the setup automatically.
Records Propagation takes time between 10 minutes to 72 hours.
Mx record is used for delivering the email to Office 365
Txt record is used to prove that you are a valid sender.
CNAME record helps to configure Outlook application.
Do let us know if you have any question about this in the comment section.
Tag: How to Migrate your Domain Service to Microsoft 365