In this blog I will share everything you should know about Office 365 Archiving Setup, Troubleshooting and backup.
Office 365 archiving is a feature, when enabled on supported mailboxes, a new mailbox is provisioned called archive mailbox and emails are gradually moved to this mailbox depending on the archive policy.
By default, Default MRM policy is assigned to the mailbox with archive turned ON, it has a default action of moving all the emails older then 2 years to the archive.
When the emails are moved from primary mailbox to archive mailbox they retain their folder structure.
If you have to find the emails in Archive mailbox you will have to navigate to the same folder where it was in the primary mailbox to find them.
So lets start with the setup of Archive in Office 365 following with troubleshooting and Backup.
How to Setup Office 365 Archiving:
Shared mailboxes have free 50gb archiving available, it is not enabled by default.
To turn on Archiving on a mailbox or shared mailbox please refer this Article.
Once you have enabled the archiving, Default MRM Policy gets assigned to it, which moves emails older than 2 years to the archive.
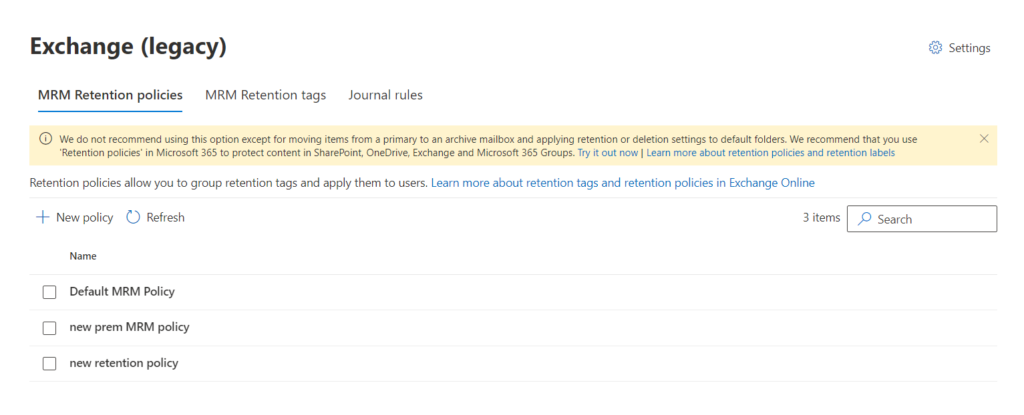
How to create office 365 archive retention policy:
Go to https://compliance.microsoft.com/exchangeinformationgovernance and sign in with the Exchange or Global admin account.
We will have to first create a tag as per the need and then put that tag into a policy to apply it to a mailbox.
To create a Retention Tag click on MRM Retention Tags tab on the page and then click on +New tag:
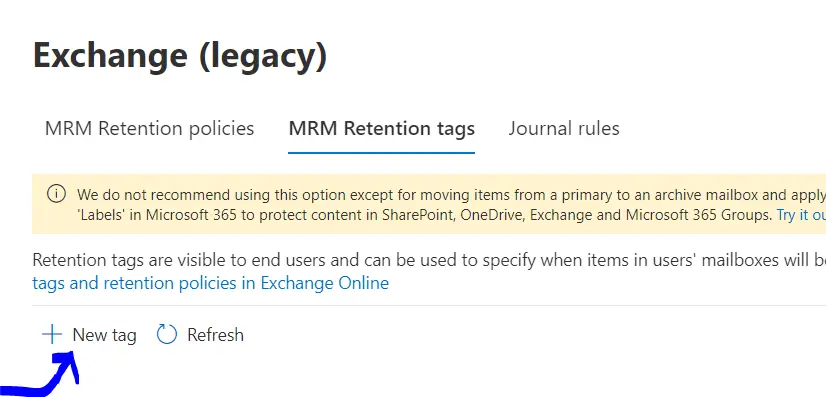
Give it a name and Description and hit Next.
Depending on your requirement you can select the type of the tag:
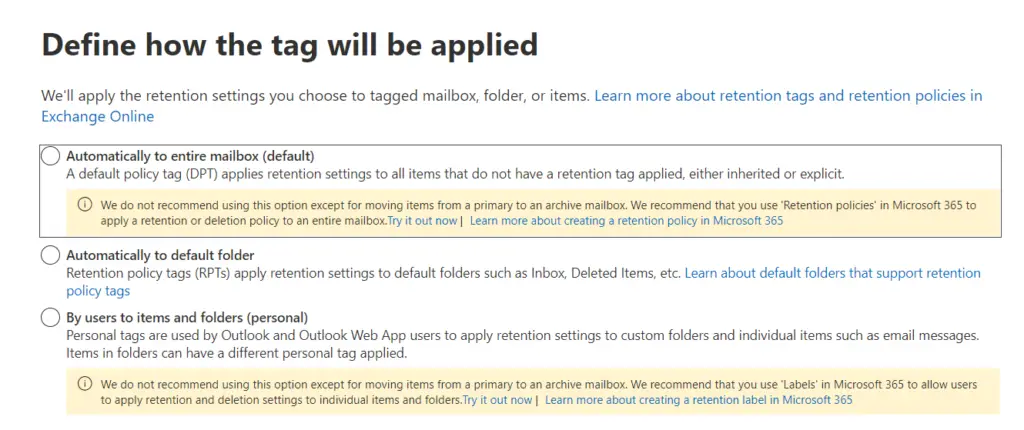
There are 3 different tags and all their description are mentioned on the page.
Defaults tag: Gets applied to entire mailbox, user action is not needed.
Retention policy tab: Can be applied to any default folder without user action.
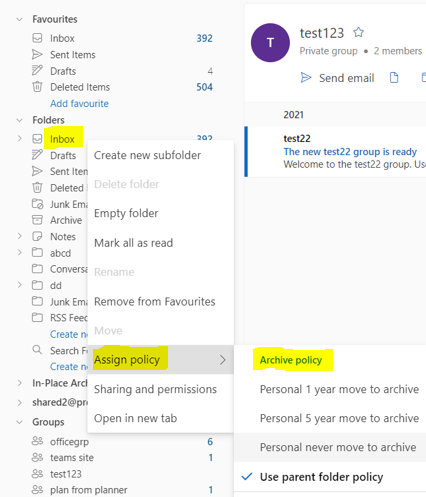
Personal tag: Has to be assigned by end user on the folder or emails they like. It has the Highest Priority among all the tags.
To apply personal tag, end user will have to Open Outlook on the web and right click on the folder or email they want to apply the policy on and then click on Assign Policy option, Once clicked, you should see all the Personal tags available for you under Archive policy:
On the next page you will be asked to choose the retention period:

You can specify the age of the emails to perform the required retention action.
If you wants emails older than 5 years to move to archive then you will have to mention 5 x 365 = 1825 Days there.
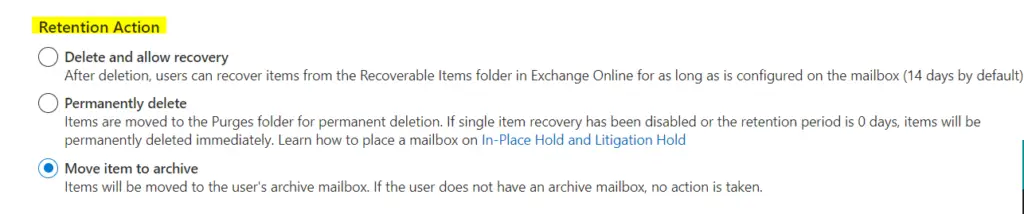
The action of retention policy is what we should also look for, apart from Moving emails to archive, it can also have other actions such as : Delete and allow recovery and Permanently delete:
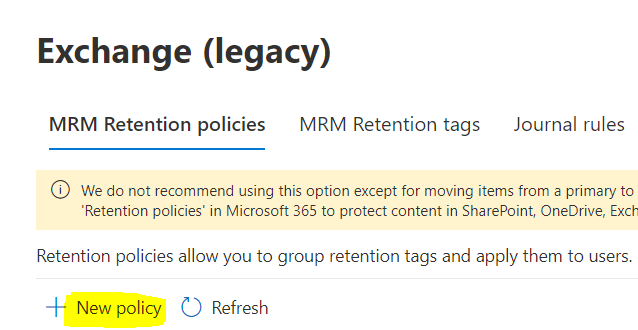
Once you have successfully created Retention tag, you will have to then Create a new Retention policy and add the Retention tag to it.
Go back to the MRM Retention policies tab and click on +New policy and Give it a name and click on Add tag to add the tag which you have created and then submit the changes:
Now once you have the policy created you can go ahead and apply it to the mailbox you want.
How to Apply Retention policy to a mailbox:
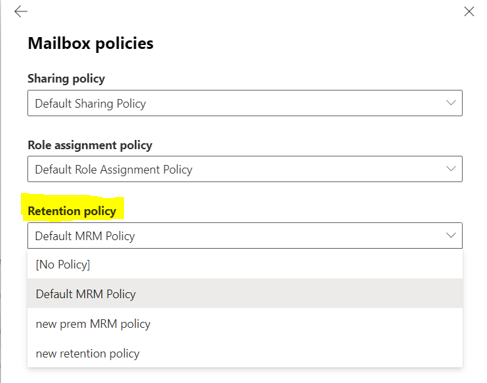
To apply it go to https://admin.exchange.microsoft.com/#/mailboxes, search for the mailbox and click on its name > Then click on Mailbox tab and scroll down to the bottom and click on Manage mailbox policies under Retention policy.
Select the required Retention policy from the drop down and click Save:
It can take from 1 day to 7 days for the changes to take effect.
How to troubleshoot the Online Archive issue:
If you are not able to see the Online archive mailbox in your Outlook please check if your Outlook version supports it.
How to Fix in-place archive not moving emails:
Exchange online archive, in place archive office 365, outlook 365 archive, online archive office 365 are all know as Office 365 Archiving.
If your emails are not moving to archive, please refer this article for step by step isolation and fixing the issue.
How to backup Online Archive in office 365:
You can backup the emails from Online archive using Outlook desktop application in the form of PST file, while exporting you just have to select the Online archive mailbox and then export it, all the other steps are same as shown in this Article.
In this way you should be able to setup, troubleshoot and backup Online Archive in Office 365.
Do let me know if you have any question in the comment section.
Date: 30/05/2023
Author: Prem
Pingback: The term 'Start-ManagedFolderAssistant' is not recognized as the name of a cmdlet, function, script file, or operable program - The Admin 365