Hi everyone this is Prem, I have worked as Microsoft 365 Support Ambassador. In this blog I will share how Export and Import Emails using Outlook.
To export emails from outlook application you need to have Outlook application installed on your computer.
Once the outlook is installed on the computer you have to configure the account of which you want to export emails from.
Make sure that all the emails are downloaded in the outlook as during export only the downloaded emails gets converted to PST file, if the emails are still on the server but not downloaded on the Outlook then they will be missed during export.
For Exchange account you can confirm that the Download emails from the past slider is set to All:
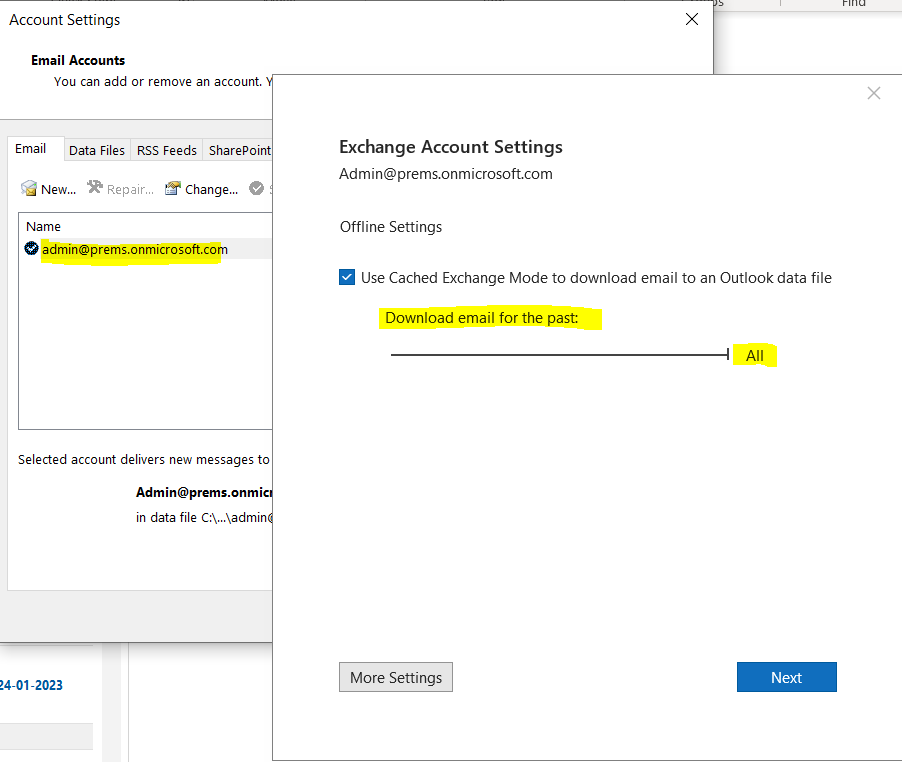
To find the above setting page Open Outlook> click on File tab > Account settings > Account settings > Double click on the email you want to export.
If you have recently changed the setting, allow Outlook sometime till it updates all the emails, once confirmed its completed move to the next steps.
Steps to Export and Import Emails using Outlook:
To Export emails from Outlook follow the steps below:
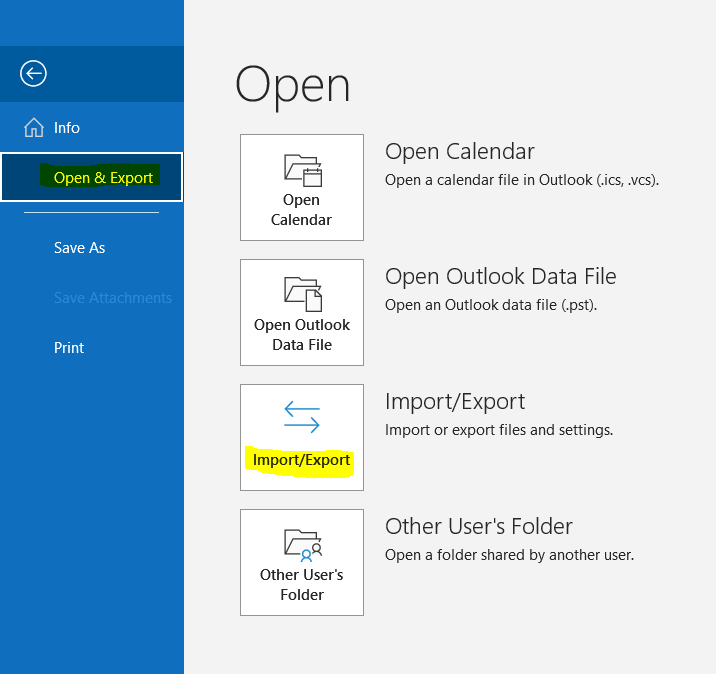
Open Outlook > Click on File tab > Click on Open & Export > Import/Export:
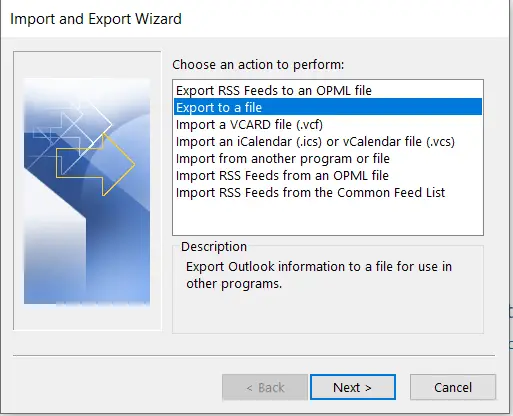
Import and Export Wizard will Open> select Export to a file:
Select Outlook Data File (.pst):

Click on the arrow beside the email address you want to export for it to collapse, Make sure the correct email address is highlighted:
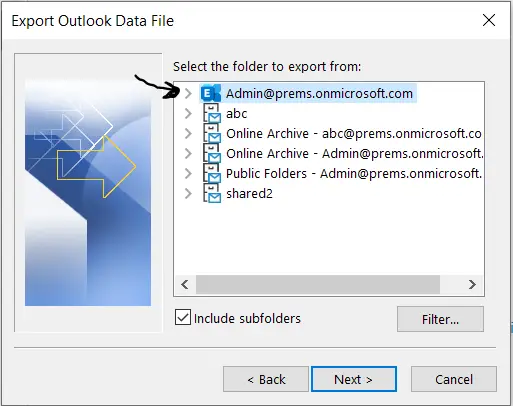
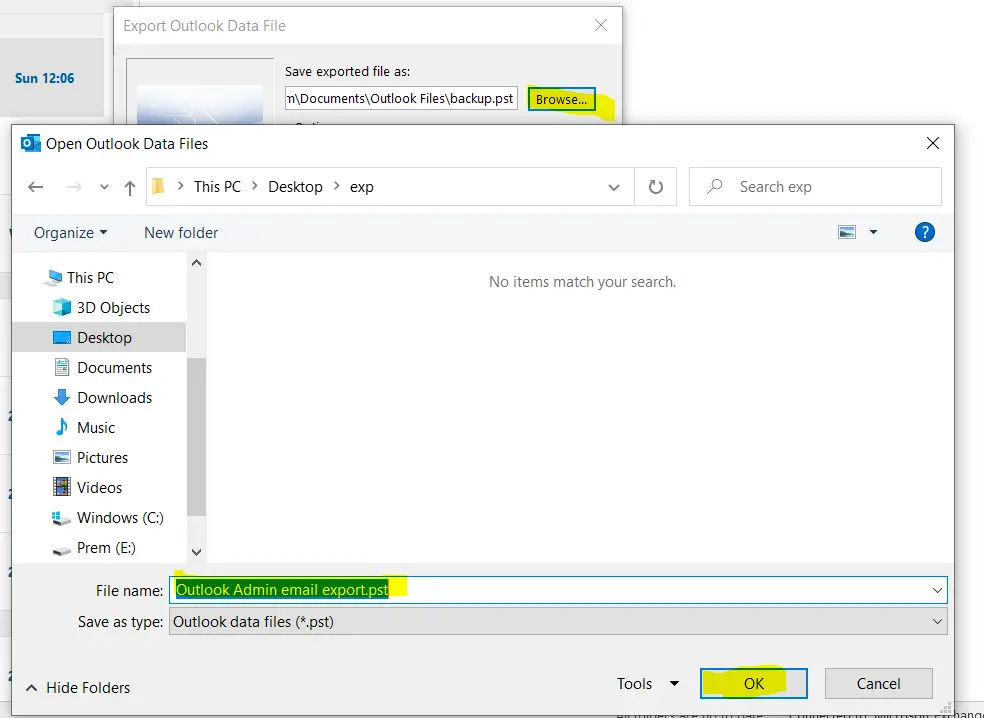
In my example I am exporting email of account Admin@prems.onmicrosoft.com.
By default it will have a location and file name to export, click on browse and change the location and give it a new file name for the pst file:
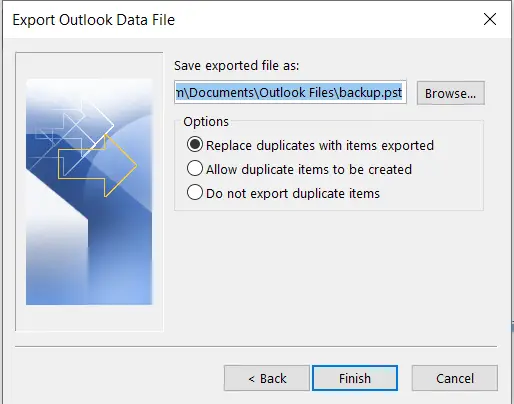
Once the location and name of the file is selected, click on Finish:

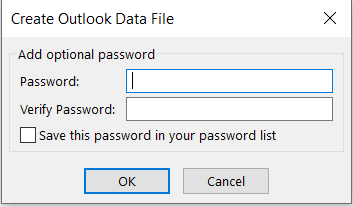
If you want to secure the pst with a password enter a password or just click on OK to export without a Password:
It will then start the exporting:
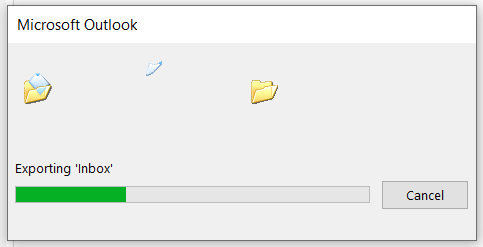
During Export process Outlook might go into Not responding state, don’t close Outlook as it will recover by itself and complete the export, Exporting can take time depending of the size of the mailbox being exported.
Once the export is completed you should find the file in the directory which you have exported it to.
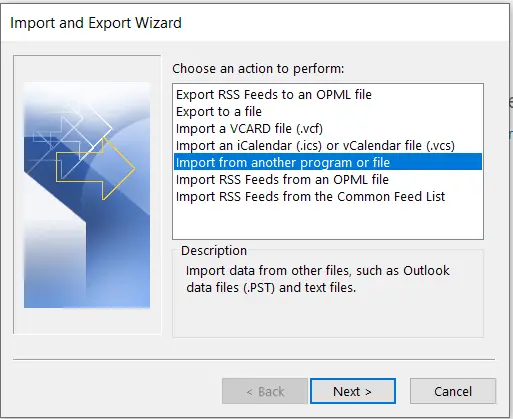
To Import the emails to Account using Outlook follow the steps below:
Open Outlook > Click on File tab > Click on Open & Export > Import/Export:
Import and Export Wizard will Open> select Import from another program or file:
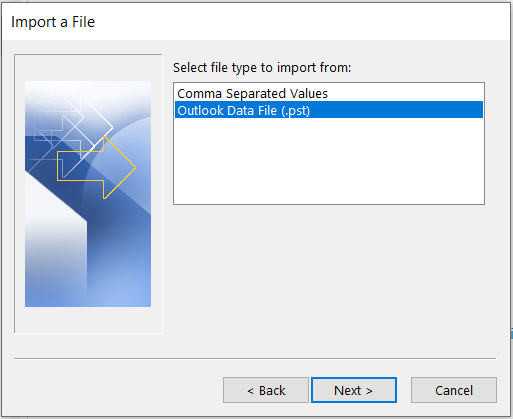
Select Outlook Data File (.Pst):
Click on Browse to select and Open the pst file which we have to import:
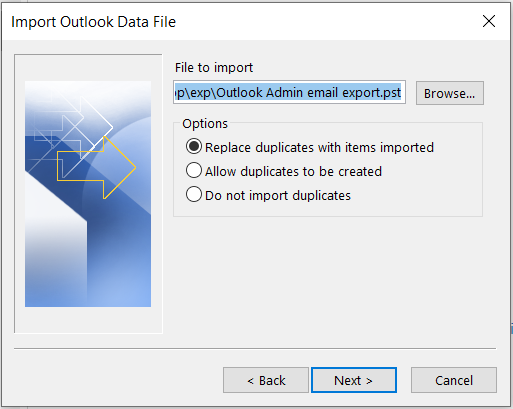
Once selected click on Next>.
On the next page, Make sure the entire Outlook data file is highlighted as below(Outlook Data file is called PST file), Select Import items into the same folder in: and from the dropdown select the email account on which you want to import the pst emails:
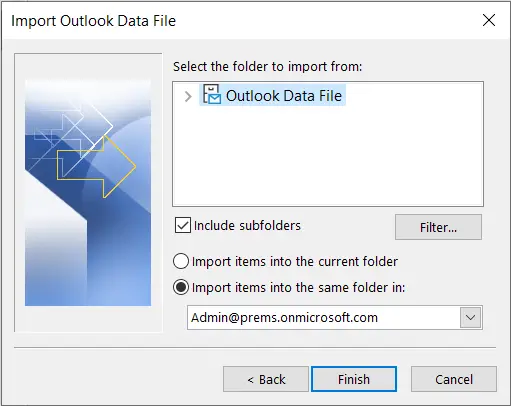
In the above Image emails from the pst file are getting imported in the account Admin@prems.onmicrosoft.com into respective folders.
Once done Click on Finish to start the importing process.
After the importing is done, the emails will start to sync from Outlook to the server, Once the emails are uploaded completely, they will be available to all the other devices where the account is configured.
Keep the Outlook open during the process of uploading of the emails to the server.
In this way we can Export and Import Emails using Outlook, do let us know if you have any question in the comments.
Date: 08/02/2023
Author: Prem
Tag: How to Export and Import Emails using Outlook