In this blog I will share How to Enable Dial pad in Microsoft Teams which allows user to make and receive PSTN calls in Office 365.
Microsoft teams dial pad shows up on a user account only when the license and account settings is set up correctly for the account.
We will talk about each one by one.
Steps for How to Enable Dial pad in Microsoft Teams:
Assign the Licenses Required to the account:
We need Microsoft Teams license, Microsoft Teams Phone System, Microsoft Teams Calling Plan, either Domestic or Domestic and International calling plan.
You can purchase the license from the admin center or refer the following LINK.
Once you have the license required, follow the steps below to assign the license to a user account:
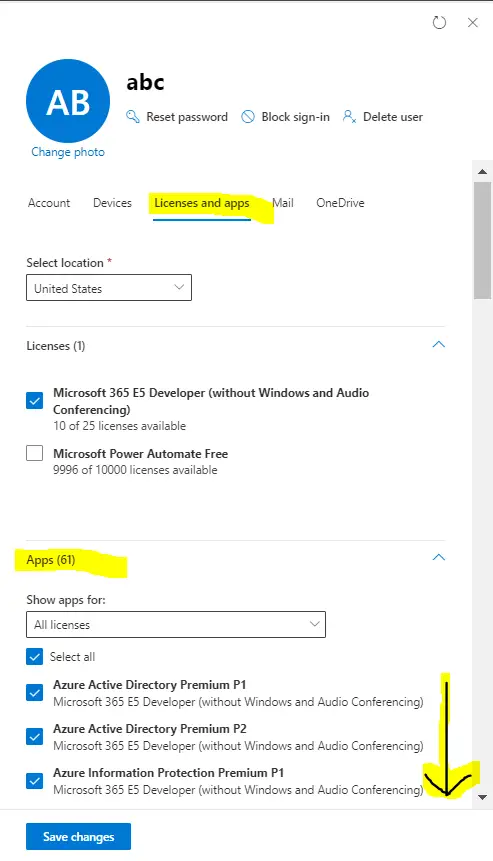
Go to the Microsoft Admin center > then click on Users tab > then click on Active Users Tab > Search and click on the user’s name > click on Licenses and Apps tab > Assign the required Licenses.
Note: Teams Phone Resource Account license is required only for resource account which are used in Call queue and Auto Attendant.
Summary: We need Microsoft Teams license, Microsoft Teams Phone System and a Calling Plan.
Assign a User Phone Number to the account:
A user phone number is needed to be assigned to the user on which the required licenses for teams PSTN calling ( To enable Dial Pad ) is assigned using the previous steps.
To Acquire Phone Number follow the steps:
Open the Microsoft Teams admin center and log in with a Global admin > Click on Voice tab > then click on Phone numbers tab > then click Add > Enter a name for the order and add a description.
On the Location and quantity page, do the following:
a. Under Country or region, select a country or region.
b. Under Number type, select User (subscriber).
c. Under Quantity, depending on the number of users you want PSTN calling.
d. Choose either Location or Area code, depending on whether you want to search for phone numbers using a location’s city, or if you want to search for numbers in a specific area code.
e. If you select Location: Type the city in which your emergency address is located in the Set up emergency locations step, or if you need to create a new location for another office or a home office, click Add a location.
f. If you select Area code, type the area code you want to search, and then select Next to reserve your number.
Select the numbers you want. When you’re ready to place your order, click Place order, and then Finish.
To Assign Phone Number follow the steps:
Go to the Teams Admin center > In the left navigation, click Voice tab > Then click on Phone numbers tab.
On the Phone numbers page, select an unassigned number in the list, and then click Edit.
In the Edit pane, under Assigned to, search for the user by display name or user name, and then click Assign.
Check the Coexistence Mode for the user account:
For the Dial pad to show up for the user, after the license and the phone number is assigned to the user account, we will have to set the coexistence mode to Teams only.
To set the Coexistence Mode to Teams only follow the steps below:
Go to Teams Admin Center > Click on Users tab > then click on Manage user tab > then look for the user and click on its Display Name:

In Account tab, under Teams upgrade settings, check the Coexistence mode and change it to Teams only.
Note: When we change the coexistence mode to Teams only it cannot be reverted back.
Once all the above steps has been performed successfully, after the provisioning time of 1-2 hours the dial pad should show in Microsoft teams in Call tab.
If in case the dial Pad is not provisioned after couple of hours then please refer the article for Step by Step troubleshooting and Fixing Dial Pad Issue in Microsoft Teams.
Date: 28/08/2023
Author: Prem
Pingback: Microsoft Team Share Screen Steps - The Admin 365